Streamlining Business Operations: The Complete Guide to Salesforce and QuickBooks Integration
In this blog post, we talk about integration between QuickBooks and Salesforce using Rest API in Apex.
After completing this unit, you will able to:
1. Introduction
2. Set Up QuickBook Account
3. Create Auth. Provider
4. Create Named Credential
5. Create Invoice
6. Read Invoice
7. Create a Sales Receipt
8. Read a Sales Receipt
1. Introduction
In today's rapidly evolving business landscape, organizations are constantly seeking innovative ways to streamline operations, enhance efficiency, and drive growth. Two indispensable tools that have emerged as cornerstones of modern business operations are QuickBooks and Salesforce. QuickBooks, renowned for its robust accounting capabilities, empowers businesses to manage finances effectively, while Salesforce, a leading CRM platform, facilitates seamless customer relationship management.
In this blog post, we delve into the intricacies of QuickBooks-Salesforce integration, exploring its myriad benefits, implementation strategies, and best practices. Whether you're a small business looking to streamline financial processes or a large enterprise seeking to optimize sales operations, harnessing the combined power of QuickBooks and Salesforce integration holds the key to unlocking new efficiencies and driving sustained business success. Join us on this journey as we unravel the transformative potential of integrating QuickBooks with Salesforce.
2. Set Up QuickBook Account
Step1: Make sure you have created create a developer account for Quickbook.
Step2: Now we need to create an app.
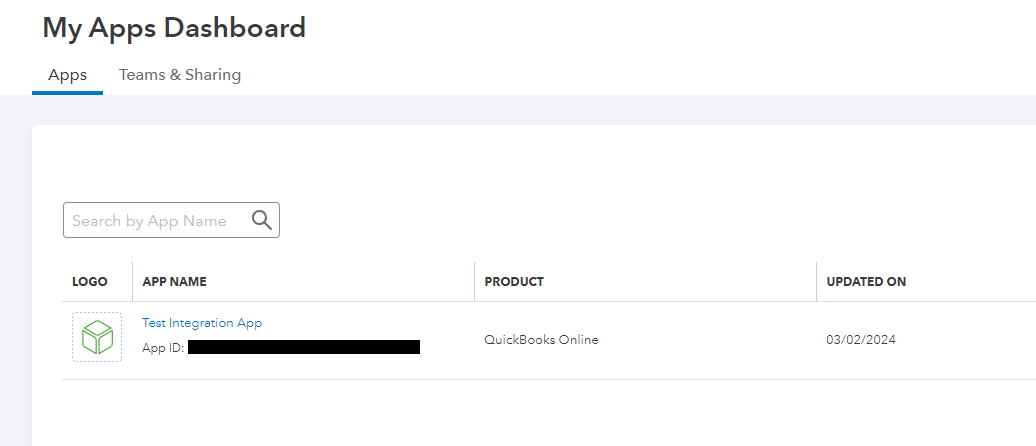
If you created an app successfully, QuickBook will create a sandbox automatically. If you are not able to see the sandbox, you can create a sandbox create it manually.
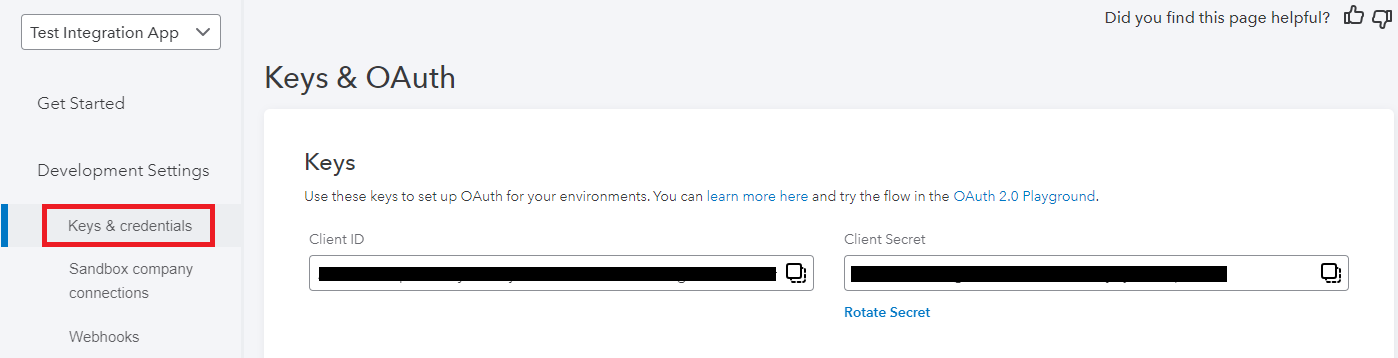
Step3: To initiate a call from Apex, you'll first need to obtain the Client_Id and Client_Secret. To do so, navigate to the application you've created and access the 'Keys & credentials' section located on the left-hand side. From there, simply copy the required keys for authentication.
3. Create Auth. Provider
In Salesforce, Named Credentials are a secure way to store authentication information for external services, such as web services or OAuth providers. They abstract these credentials from your code and make integrations more secure and manageable.
Before we create Named Credentials, We have to create Auth. Provider. Create Auth. Provider by the following steps:
- Sign in to your Salesforce account and establish Authentication Providers.
- Provider Type: Open ID Connect
- Consumer Key: Client_Id(From Quickbook)
- Consumer Secret: Client_Secret(From Quickbook)
- Authorize Endpoint URL: https://appcenter.intuit.com/connect/oauth2
- Token Endpoint URL: https://oauth.platform.intuit.com/oauth2/v1/tokens/bearer
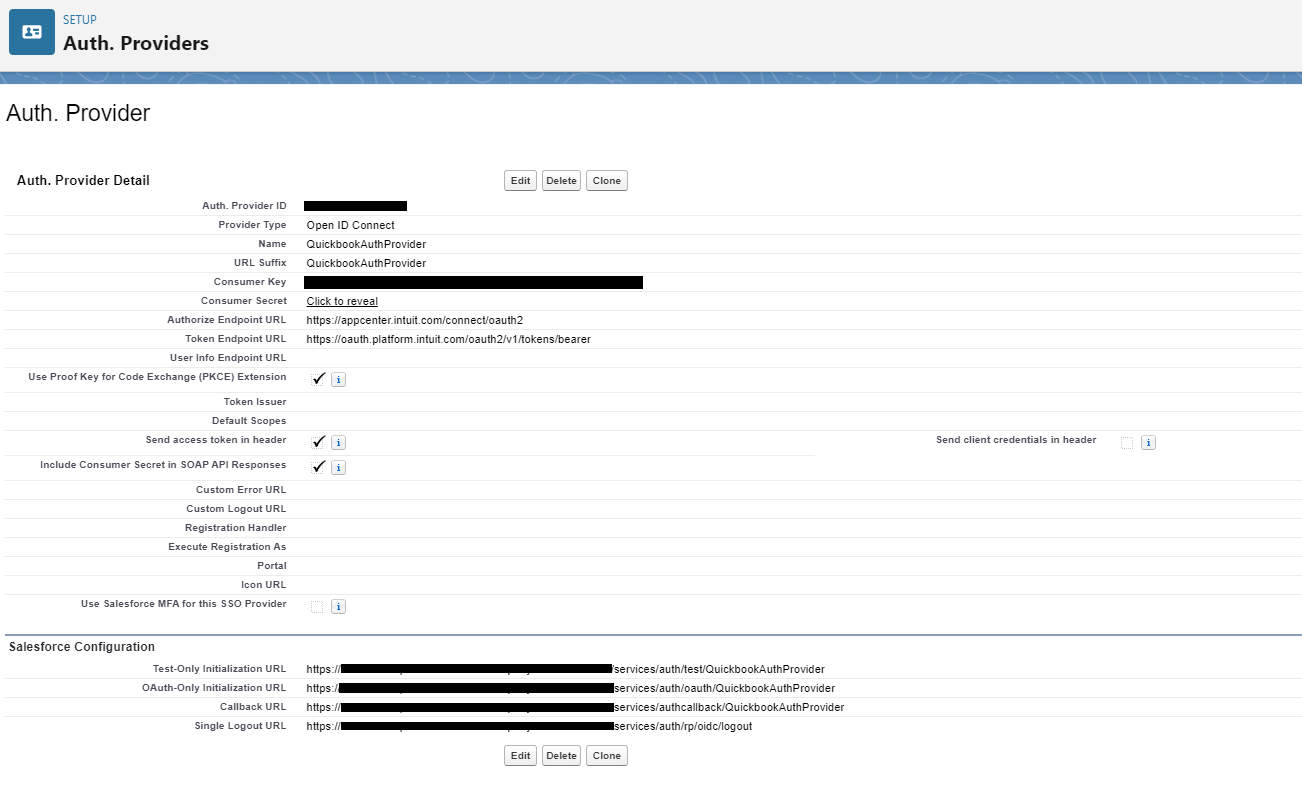
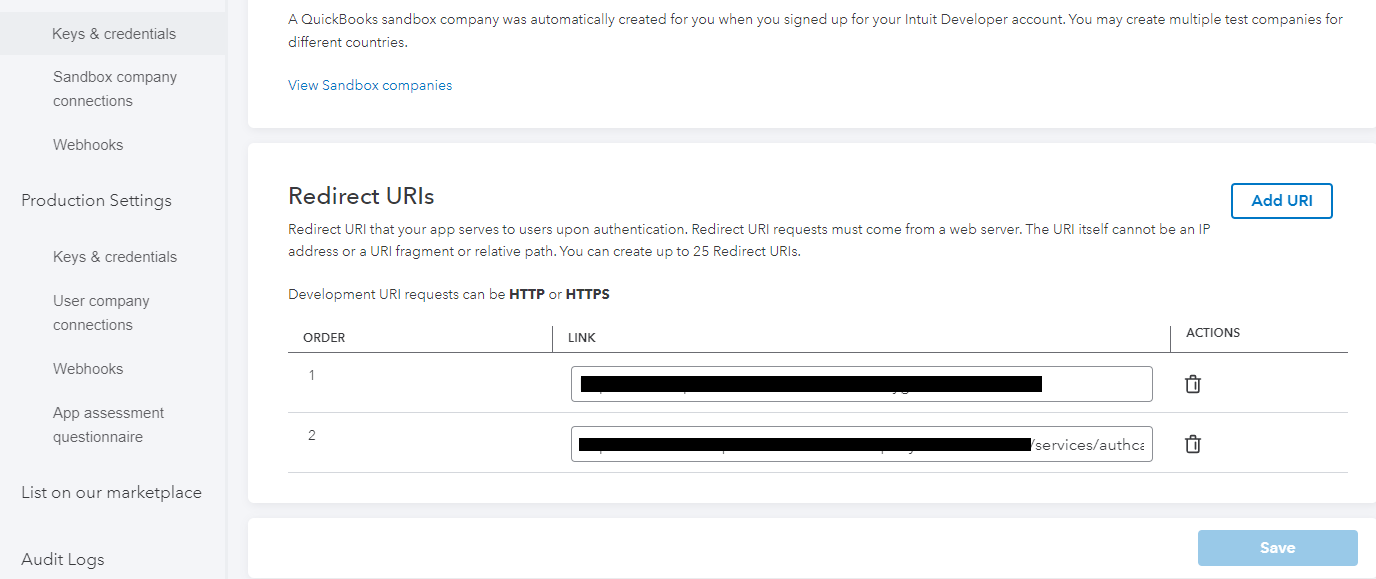
After creating Authentication Providers, you'll find the Callback URL at the bottom. Copy this URL. Then, navigate to the application you've created and access the 'Keys & credentials' section on the left. Within the Redirect URIs section, paste your Callback URL.
4. Create Named Credentials:
- URL: https://sandbox-quickbooks.api.intuit.com
- Identity Type: Named Principal
- Authentication Provider: Test App(created in Step 3)
- Scope: com.intuit.quickbooks.accounting(To learn more)
- After saving the Named Credential, ensure that the Authentication Status is set to Authenticated.

5. Create Invoice
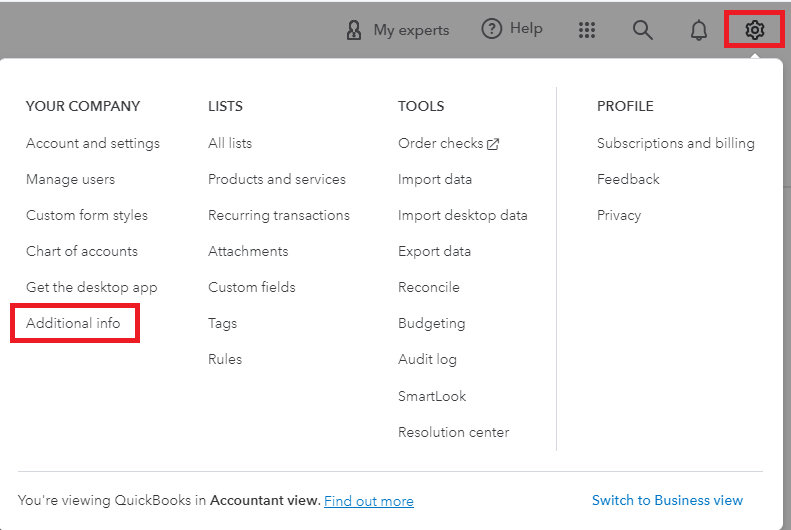
To retrieve the company ID, begin by accessing the sandbox environment. Click on the Settings icon and then choose Additional Info.
When integrating QuickBooks with Salesforce, the ability to create invoices seamlessly becomes a game-changer for businesses. By leveraging this integration, you can initiate the invoice creation process directly from within Salesforce, streamlining your workflow and ensuring accuracy. Here are the steps involved in creating an invoice through QuickBooks-Salesforce integration:
API Document:https://developer.intuit.com/app/developer/qbo/docs/api/accounting/all-entities/invoice#create-an-invoice
Production Base URL: https://quickbooks.api.intuit.com
Sandbox Base URL: https://sandbox-quickbooks.api.intuit.com
EndPoint : callout:{Named_Credentail}/v3/company/{Company_Id}/invoice?minorversion=70
Method : POST
Header Params:
| Content type | required | string | example: application/json |
Request Body Params:
| CustomerRef | required | ReferenceType |
| Line [0..n] | required | Invoice line object |
| CurrencyRef | Conditionally required | CurrencyRefType |
| ProjectRef | not required | ReferenceType |
Request Body Sample:
                        {
                            "Line": [
                              {

                                    "DetailType": "SalesItemLineDetail",

                                "Amount": 100.0,
                                "SalesItemLineDetail": {
                                  "ItemRef": {

                                        "name": "Services",

                                    "value": "1"
                                  }
                                }
                              }
                            ],
                            "CustomerRef": {
                              "value": "1"
                            }
                          }
Now, To create invoice using Rest API write below apex code in your apex class.
                    public class IntegrationWithQuickbook {


                        public static void createInvoice() {

                                String body = '{ "Line": [ { "Id":
                        "2422", "LineNum": 2, "Description": "Entertainment for the
                        event", "Amount": 5160.0, "DetailType": "SalesItemLineDetail",
                        "SalesItemLineDetail": { "ItemRef": { "value": "6", "name":
                        "General services:Entertainment" }, "UnitPrice": 2580, "Qty": 2,
                        "TaxCodeRef": { "value": "3" } } }, { "Amount": 3000.0,
                        "DetailType": "SubTotalLineDetail", "SubTotalLineDetail": {} } ],
                        "CustomerRef": { "value": "1" } }';

                            Http http = new Http();

                                HttpRequest request = new
                        HttpRequest();


                        request.setEndpoint('callout:QuickBookCredential/v3/company/9341451920539284/invoice?minorversion=70');


                                request.setHeader('Content-Type',
                        'application/json');


                                request.setHeader('Accept' ,
                        'application/json');

                            request.setMethod('GET');
                            request.setBody(body);

                                RestRequest req = RestContext.request;


                                HttpResponse response = new
                        HttpResponse();


                                response = http.send(request);


                                system.debug('>>>>response
                        body'+response.getBody());

                        }
                    }
After running above code the response will look like this:
                            {
                                "Invoice": {
                                 "AllowIPNPayment": false,
                                 "AllowOnlinePayment": false,

                                     "AllowOnlineCreditCardPayment": false,

                                 "AllowOnlineACHPayment": false,
                                 "domain": "QBO",
                                 "sparse": false,
                                 "Id": "145",
                                 "SyncToken": "0",
                                 "MetaData": {

                                      "CreateTime":
                                "2024-03-02T00:22:08-08:00",

                                  "LastModifiedByRef": {

                                       "value": "9341451920539313"

                                  },

                                      "LastUpdatedTime":
                                "2024-03-02T00:22:08-08:00"

                                 },
                                 "CustomField": [],
                                 "DocNumber": "1038",
                                 "TxnDate": "2024-03-02",
                                 "CurrencyRef": {
                                  "value": "USD",
                                  "name": "United States Dollar"
                                 },
                                 "LinkedTxn": [],
                                 "Line": [
                                  {
                                   "Id": "1",
                                   "LineNum": 1,
                                   "Amount": 100,

                                       "DetailType":
                                "SalesItemLineDetail",

                                   "SalesItemLineDetail": {
                                    "ItemRef": {
                                     "value": "1",
                                     "name": "Services"
                                    },
                                    "ItemAccountRef": {
                                     "value": "1",
                                     "name": "Services"
                                    },
                                    "TaxCodeRef": {
                                     "value": "NON"
                                    }
                                   }
                                  },
                                  {
                                   "Amount": 100,

                                       "DetailType": "SubTotalLineDetail",

                                   "SubTotalLineDetail": {}
                                  }
                                 ],
                                 "TxnTaxDetail": {
                                  "TotalTax": 0
                                 },
                                 "CustomerRef": {
                                  "value": "1",
                                  "name": "Amy's Bird Sanctuary"
                                 },
                                 "BillAddr": {
                                  "Id": "2",
                                  "Line1": "4581 Finch St.",
                                  "City": "Bayshore",
                                  "CountrySubDivisionCode": "CA",
                                  "PostalCode": "94326",
                                  "Lat": "INVALID",
                                  "Long": "INVALID"
                                 },
                                 "ShipAddr": {
                                  "Id": "2",
                                  "Line1": "4581 Finch St.",
                                  "City": "Bayshore",
                                  "CountrySubDivisionCode": "CA",
                                  "PostalCode": "94326",
                                  "Lat": "INVALID",
                                  "Long": "INVALID"
                                 },
                                 "FreeFormAddress": true,
                                 "ShipFromAddr": {
                                  "Id": "96",
                                  "Line1": "123 Sierra Way",

                                      "Line2": "San Pablo, CA  87999"

                                 },
                                 "DueDate": "2024-04-01",
                                 "TotalAmt": 100,
                                 "ApplyTaxAfterDiscount": false,
                                 "PrintStatus": "NeedToPrint",
                                 "EmailStatus": "NotSet",
                                 "Balance": 100
                                },
                                "time": "2024-03-02T00:22:08.048-08:00"
                               }
6. Read Invoice
Now we read the invoice which we have created using above steps:
API Document:https://developer.intuit.com/app/developer/qbo/docs/api/accounting/all-entities/invoice#read-an-invoice
Production Base URL: https://quickbooks.api.intuit.com
Sandbox Base URL: https://sandbox-quickbooks.api.intuit.com
EndPoint : callout:{Named_Credentail}/v3/company/{Company_Id}/invoice/<invoiceId>?minorversion=70
Method : GET
Header Params:
| Content-Type | required | string | application/json |
| Accept | required | string | application/json |
Now, To read invoice using Rest API write below apex code in your apex class.
                    public class IntegrationWithQuickbook {
                        public static void getInvoice(){
                            Http http = new Http();

                                HttpRequest request = new
                        HttpRequest();


                        request.setEndpoint('callout:QuickBookCredential/v3/company/9341451920539284/invoice/145?minorversion=70');


                                request.setHeader('Content-Type',
                        'application/json');


                                request.setHeader('Accept' ,
                        'application/json');

                            request.setMethod('GET');

                                RestRequest req = RestContext.request;


                                HttpResponse response = new
                        HttpResponse();


                                response = http.send(request);


                                system.debug('>>>>response
                        body'+response.getBody());

                        }
                    }
After running above code the response will look like this:
                            {
                                "Invoice": {
                                 "AllowIPNPayment": false,
                                 "AllowOnlinePayment": false,

                                     "AllowOnlineCreditCardPayment": false,

                                 "AllowOnlineACHPayment": false,
                                 "domain": "QBO",
                                 "sparse": false,
                                 "Id": "145",
                                 "SyncToken": "0",
                                 "MetaData": {

                                      "CreateTime":
                                "2024-03-02T00:22:08-08:00",

                                  "LastModifiedByRef": {

                                       "value": "9341451920539313"

                                  },

                                      "LastUpdatedTime":
                                "2024-03-02T00:22:08-08:00"

                                 },
                                 "CustomField": [],
                                 "DocNumber": "1038",
                                 "TxnDate": "2024-03-02",
                                 "CurrencyRef": {
                                  "value": "USD",
                                  "name": "United States Dollar"
                                 },
                                 "LinkedTxn": [],
                                 "Line": [
                                  {
                                   "Id": "1",
                                   "LineNum": 1,
                                   "Amount": 100,

                                       "DetailType":
                                "SalesItemLineDetail",

                                   "SalesItemLineDetail": {
                                    "ItemRef": {
                                     "value": "1",
                                     "name": "Services"
                                    },
                                    "ItemAccountRef": {
                                     "value": "1",
                                     "name": "Services"
                                    },
                                    "TaxCodeRef": {
                                     "value": "NON"
                                    }
                                   }
                                  },
                                  {
                                   "Amount": 100,

                                       "DetailType": "SubTotalLineDetail",

                                   "SubTotalLineDetail": {}
                                  }
                                 ],
                                 "TxnTaxDetail": {
                                  "TotalTax": 0
                                 },
                                 "CustomerRef": {
                                  "value": "1",
                                  "name": "Amy's Bird Sanctuary"
                                 },
                                 "BillAddr": {
                                  "Id": "2",
                                  "Line1": "4581 Finch St.",
                                  "City": "Bayshore",
                                  "CountrySubDivisionCode": "CA",
                                  "PostalCode": "94326",
                                  "Lat": "INVALID",
                                  "Long": "INVALID"
                                 },
                                 "ShipAddr": {
                                  "Id": "2",
                                  "Line1": "4581 Finch St.",
                                  "City": "Bayshore",
                                  "CountrySubDivisionCode": "CA",
                                  "PostalCode": "94326",
                                  "Lat": "INVALID",
                                  "Long": "INVALID"
                                 },
                                 "FreeFormAddress": true,
                                 "ShipFromAddr": {
                                  "Id": "96",
                                  "Line1": "123 Sierra Way",

                                      "Line2": "San Pablo, CA  87999"

                                 },
                                 "DueDate": "2024-04-01",
                                 "TotalAmt": 100,
                                 "ApplyTaxAfterDiscount": false,
                                 "PrintStatus": "NeedToPrint",
                                 "EmailStatus": "NotSet",
                                 "Balance": 100
                                },
                                "time": "2024-03-04T02:25:14.621-08:00"
                               }
7. Create a Sales Receipt
Now we create the sales receipt using the following steps:
API Document:https://developer.intuit.com/app/developer/qbo/docs/api/accounting/all-entities/salesreceipt#create-a-salesreceipt
Production Base URL: https://quickbooks.api.intuit.com
Sandbox Base URL: https://sandbox-quickbooks.api.intuit.com
EndPoint : callout:{Named_Credentail}/v3/company/{Company_Id}/salesreceipt?minorversion=70
Method : POST
Header Params:
| Content type | required | string | application/json |
Request Body Params:
| Line [0..n] | required | ReferenceType |
| CurrencyRef | Conditionally required | CurrencyRefType |
| ProjectRef | not required | ReferenceType |
Request Body Sample:
                            {
                                "Line": [
                                  {

                                        "Description": "Pest Control
                                Services",


                                        "DetailType":
                                "SalesItemLineDetail",

                                    "SalesItemLineDetail": {
                                      "TaxCodeRef": {

                                            "value": "NON"

                                      },
                                      "Qty": 1,
                                      "UnitPrice": 35,
                                      "ItemRef": {

                                            "name": "Pest
                                Control",


                                            "value": "10"

                                      }
                                    },
                                    "LineNum": 1,
                                    "Amount": 35.0,
                                    "Id": "1"
                                  }
                                ]
                              }
Now, To create invoice using Rest API write below apex code in your apex class.
                            public class IntegrationWithQuickbook {

                                    public static void createSalesReceipt(){


                                        String body = '{ "Line": [ {
                                "Description": "Pest Control Services", "DetailType":
                                "SalesItemLineDetail", "SalesItemLineDetail": { "TaxCodeRef":
                                { "value": "NON" }, "Qty": 1, "UnitPrice": 35, "ItemRef": {
                                "name": "Pest Control", "value": "10" } }, "LineNum": 1,
                                "Amount": 35.0, "Id": "1" } ] }';

                                    Http http = new Http();

                                        HttpRequest request = new
                                HttpRequest();


                                request.setEndpoint('callout:QuickBookCredential/v3/company/9341451920539284/salesreceipt?minorversion=70');


                                        request.setHeader('Content-Type',
                                'application/json');


                                        request.setHeader('Accept' ,
                                'application/json');


                                        request.setMethod('POST');

                                    request.setBody(body);

                                        RestRequest req =
                                RestContext.request;


                                        HttpResponse response = new
                                HttpResponse();


                                        response = http.send(request);


                                system.debug('>>>>createSalesReceipt response
                                body'+response.getBody());

                                }
                            }
After running above code the response will look like this:
                                    {
                                        "SalesReceipt": {
                                          "domain": "QBO",
                                          "sparse": false,
                                          "Id": "148",
                                          "SyncToken": "0",
                                          "MetaData": {

                                                "CreateTime":
                                        "2024-03-04T02:48:46-08:00",


                                                "LastUpdatedTime":
                                        "2024-03-04T02:48:46-08:00"

                                          },
                                          "CustomField": [],
                                          "DocNumber": "1041",
                                          "TxnDate": "2024-03-04",
                                          "CurrencyRef": {
                                            "value": "USD",

                                                "name": "United States Dollar"

                                          },
                                          "Line": [
                                            {
                                              "Id": "1",
                                              "LineNum": 1,

                                                  "Description": "Pest
                                        Control Services",

                                              "Amount": 35,

                                                  "DetailType":
                                        "SalesItemLineDetail",


                                                  "SalesItemLineDetail":
                                        {


                                                    "ItemRef": {


                                                      "value":
                                        "10",


                                                      "name":
                                        "Pest Control"

                                                },

                                                    "UnitPrice": 35,


                                                    "Qty": 1,


                                        "ItemAccountRef": {


                                                      "value":
                                        "54",


                                                      "name":
                                        "Pest Control Services"

                                                },

                                                    "TaxCodeRef": {


                                                      "value":
                                        "NON"

                                                }
                                              }
                                            },
                                            {
                                              "Amount": 35,

                                                  "DetailType":
                                        "SubTotalLineDetail",


                                                  "SubTotalLineDetail":
                                        {}

                                            }
                                          ],
                                          "TxnTaxDetail": {
                                            "TotalTax": 0
                                          },
                                          "ShipFromAddr": {
                                            "Id": "99",

                                                "Line1": "123 Sierra Way",


                                                "Line2": "San Pablo, CA
                                         87999"

                                          },
                                          "TotalAmt": 35,

                                              "ApplyTaxAfterDiscount": false,


                                              "PrintStatus": "NeedToPrint",

                                          "EmailStatus": "NotSet",
                                          "Balance": 0,
                                          "DepositToAccountRef": {
                                            "value": "4",

                                                "name": "Undeposited Funds"

                                          }
                                        },

                                            "time": "2024-03-04T02:48:46.369-08:00"

                                      }
8. Read a Sales Receipt
Now we read the sales receipt which we have created using above steps:
API Document: https://developer.intuit.com/app/developer/qbo/docs/api/accounting/all-entities/salesreceipt
Production Base URL: https://quickbooks.api.intuit.com
Sandbox Base URL: https://sandbox-quickbooks.api.intuit.com
EndPoint:callout:{Named_Credentail}/v3/company/{Company_Id}/salesreceipt/<salesreceiptId>?minorversion=70
Method :GET
Header Params:
Now, To read invoice using Rest API write below apex code in your apex class.
                    public class IntegrationWithQuickbook {
                        public static void getSalesReceipt(){
                            Http http = new Http();

                                HttpRequest request = new
                        HttpRequest();


                        request.setEndpoint('callout:QuickBookCredential/v3/company/9341451920539284/salesreceipt/148?minorversion=70');


                                request.setHeader('Content-Type',
                        'application/json');


                                request.setHeader('Accept' ,
                        'application/json');

                            request.setMethod('GET');

                                RestRequest req = RestContext.request;


                                HttpResponse response = new
                        HttpResponse();


                                response = http.send(request);


                        system.debug('>>>>getSalesReceipt response
                        body'+response.getBody());

                        }
                    }
After running above code the response will look like this:
                        {
                            "SalesReceipt": {
                              "domain": "QBO",
                              "sparse": false,
                              "Id": "148",
                              "SyncToken": "0",
                              "MetaData": {

                                    "CreateTime":
                            "2024-03-04T02:34:42-08:00",


                                    "LastUpdatedTime":
                            "2024-03-04T02:34:42-08:00"

                              },
                              "CustomField": [],
                              "DocNumber": "1040",
                              "TxnDate": "2024-03-04",
                              "CurrencyRef": {
                                "value": "USD",

                                    "name": "United States Dollar"

                              },
                              "Line": [
                                {
                                  "Id": "1",
                                  "LineNum": 1,

                                      "Description": "Pest Control
                            Services",

                                  "Amount": 35,

                                      "DetailType":
                            "SalesItemLineDetail",


                                      "SalesItemLineDetail": {

                                    "ItemRef": {

                                          "value": "10",


                                          "name": "Pest
                            Control"

                                    },

                                        "UnitPrice": 35,

                                    "Qty": 1,

                                        "ItemAccountRef": {


                                          "value": "54",


                                          "name": "Pest
                            Control Services"

                                    },

                                        "TaxCodeRef": {


                                          "value": "NON"

                                    }
                                  }
                                },
                                {
                                  "Amount": 35,

                                      "DetailType":
                            "SubTotalLineDetail",


                                      "SubTotalLineDetail": {}

                                }
                              ],
                              "TxnTaxDetail": {
                                "TotalTax": 0
                              },
                              "ShipFromAddr": {
                                "Id": "98",
                                "Line1": "123 Sierra Way",

                                    "Line2": "San Pablo, CA  87999"

                              },
                              "TotalAmt": 35,
                              "ApplyTaxAfterDiscount": false,
                              "PrintStatus": "NeedToPrint",
                              "EmailStatus": "NotSet",
                              "Balance": 0,
                              "DepositToAccountRef": {
                                "value": "4",
                                "name": "Undeposited Funds"
                              }
                            },
                            "time": "2024-03-04T02:47:53.387-08:00"
                          }